
Welcome to the world of DIY resin art, where creativity knows no bounds! This epoxy resin art tutorial is designed to guide beginners through the process of creating stunning pieces that reflect their unique style.
With resin art for beginners, the possibilities are endless. You can create beautiful decorative items, jewelry, or even functional pieces like coasters and tabletops. The key is to experiment and have fun with the process.

As you embark on this creative journey, you'll discover the joy of working with epoxy resin. It's a versatile medium that allows you to express your artistic side and create truly unique pieces.
Key Takeaways
- Learn the basics of epoxy resin art
- Discover creative ways to use resin
- Understand the importance of safety precautions
- Explore different techniques for achieving unique effects
- Create your own stunning resin art pieces
Understanding Epoxy Resin and Its Types
For those new to epoxy resin, understanding its basics is crucial for unlocking its full potential in art projects. Epoxy resin is a versatile and popular medium among artists due to its durability and aesthetic appeal.
What is Epoxy Resin?
Epoxy resin is a type of plastic that hardens when mixed with a hardener, creating a strong and durable finish. It's known for its high-gloss finish and ability to be colored or pigmented, making it ideal for various art projects.
The mixture of resin and hardener triggers a chemical reaction that results in a hard, rigid, and sometimes flexible final product, depending on the type of epoxy used.
Types of Epoxy Resin for Art
There are several types of epoxy resin available, each with its unique characteristics and applications:
- Crystal Clear Epoxy: Ideal for projects requiring transparency and clarity.
- UV-Resistant Epoxy: Perfect for outdoor or long-lasting projects, as it resists yellowing caused by UV exposure.
- Flexible Epoxy: Used for projects that require flexibility, such as jewelry or decorative items that may be subject to movement or stress.
- High-Heat Epoxy: Suitable for applications exposed to high temperatures, such as river tables or decorative pieces near heat sources.
Benefits of Using Epoxy Resin
Epoxy resin offers numerous benefits for artists, including:
- Durability: Creates a hard, durable finish that resists wear and tear.
- Aesthetic Versatility: Can be colored, pigmented, or mixed with various materials to achieve unique effects.
- Versatility in Application: Suitable for a wide range of art projects, from decorative items to functional pieces like furniture.
- Easy to Work With: When handled correctly, epoxy resin is relatively easy to mix and apply, making it accessible to artists of various skill levels.
Understanding the different types of epoxy resin and their benefits is essential for selecting the right material for your art projects, ensuring that your creations are both beautiful and durable.
Essential Tools and Materials for Your Project
Before diving into your epoxy resin project, it's crucial to have the necessary tools and materials at hand. This preparation will not only ensure a smooth workflow but also contribute to the quality of your final art piece.
List of Tools You’ll Need
To get started, you'll need a few basic tools. These include a mixing cup, stir sticks, a heat gun, and gloves. The mixing cup is essential for accurately measuring the resin and hardener, while the stir sticks are used to mix these components thoroughly. A heat gun is handy for removing bubbles from the resin mixture.
- A mixing cup with measurements
- Stir sticks for thorough mixing
- A heat gun for bubble removal
- Gloves for protection
Recommended Epoxy Resin Brands
Choosing the right epoxy resin brand can be daunting, given the numerous options available. Here’s a comparison of some popular brands:
| Brand | Mix Ratio | Curing Time | Price Range |
|---|---|---|---|
| Pro Epoxy | 1:1 | 24 hours | €50 - €100 |
| ResinLab | 2:1 | 12 hours | €30 - €70 |
| EpoxyCraft | 1:1 | 24 hours | €40 - €90 |
When selecting an epoxy resin brand, consider factors like mix ratio, curing time, and price. Pro Epoxy and EpoxyCraft are known for their high-quality finish, while ResinLab offers a faster curing time.
Safety Gear for Working with Epoxy
Safety should be your top priority when working with epoxy resin. Essential safety gear includes gloves, goggles, and a mask. Gloves protect your skin from the resin and hardener, while goggles safeguard your eyes. A mask is crucial for preventing the inhalation of fumes.
- Gloves for skin protection
- Goggles for eye protection
- A mask for respiratory protection
By equipping yourself with the right tools, materials, and safety gear, you'll be well-prepared to create stunning epoxy resin art pieces.
Preparing Your Workspace
The foundation of a great epoxy resin art piece lies in the preparation of your workspace. A well-organized and safe workspace not only enhances your creativity but also ensures a smooth and enjoyable crafting experience.
Choosing the Right Location
When it comes to selecting a location for your epoxy resin art project, there are several factors to consider. Ideally, you want a space that is well-ventilated and free from dust. A dedicated workspace, such as a studio or a garage, is perfect because it allows you to leave your project setup undisturbed.
If a dedicated space isn't available, a section of a room can work just as well, provided it's away from direct sunlight and foot traffic. Covering your work surface with a protective layer, like a plastic tablecloth or old sheets, can also help prevent damage and make cleanup easier.
Setting Up Your Workstation
Setting up your workstation involves more than just laying out your tools and materials. It's about creating an efficient workflow that minimizes errors and maximizes productivity. Start by organizing your epoxy resin, hardener, mixing cups, stir sticks, and any pigments or additives within easy reach.
Using a rotating turntable can be particularly helpful, as it allows you to access your project from all sides without having to move around. Ensure that your workspace is also equipped with protective gear, including gloves, goggles, and a mask, to safeguard against the potential hazards of working with epoxy resin.
Ensuring Proper Ventilation
Proper ventilation is crucial when working with epoxy resin, as the fumes emitted during the mixing and curing process can be harmful if inhaled. To ensure good airflow, open windows and doors to provide cross ventilation, or use fans to circulate the air.
If you're working in an enclosed space, consider using a respirator mask rated for organic vapors. Additionally, keeping an activated charcoal filter nearby can help absorb any lingering fumes, making your workspace safer and more comfortable.
Mixing Epoxy Resin: A Step-by-Step Guide
Achieving a flawless epoxy resin finish starts with mastering the mixing technique. Proper mixing is crucial for the durability and aesthetic appeal of your epoxy resin art.
Measuring Resin and Hardener
The first step in mixing epoxy resin is accurately measuring the resin and hardener. Most epoxy resins come with a specific mix ratio, typically 1:1 or 2:1. It's essential to follow the manufacturer's instructions for the correct ratio.
- Use digital scales for precise measurement.
- Ensure the mixing area is clean and free from dust.
- Measure the components in separate containers before mixing.
Mixing Techniques for Uniformity
Once you have measured the resin and hardener, it's time to mix. The goal is to achieve a uniform mixture without introducing air bubbles.
- Pour the resin and hardener into a mixing cup.
- Mix slowly and thoroughly, scraping the sides and bottom of the cup.
- Avoid mixing too vigorously, as this can create bubbles.

Common Mistakes to Avoid
Even experienced artists can make mistakes when mixing epoxy resin. Here are some common pitfalls to avoid:
- Inaccurate measurements: This can lead to improper curing.
- Insufficient mixing: Can result in a tacky or soft finish.
- Mixing too quickly: Introduces air bubbles into the mixture.
By following these steps and avoiding common mistakes, you can achieve a professional finish in your epoxy resin art. For more resin art tips, continue to the next section of our epoxy resin art tutorial.
Creating Your First Epoxy Resin Art Piece
Creating your first epoxy resin art piece is an exciting project that combines creativity with technical skill. Epoxy resin offers a world of possibilities for artists, from crafting beautiful decorative items to creating stunning wall art. As you begin, it's essential to understand the process and the materials involved.
Choosing Your Base Material
The base material is the foundation of your art piece. You can use a variety of materials, such as wood, canvas, or even recycled items, depending on the desired outcome. For beginners, a wooden panel is often recommended due to its durability and ease of use. Ensure that your chosen material is clean, dry, and free of dust to achieve the best results.
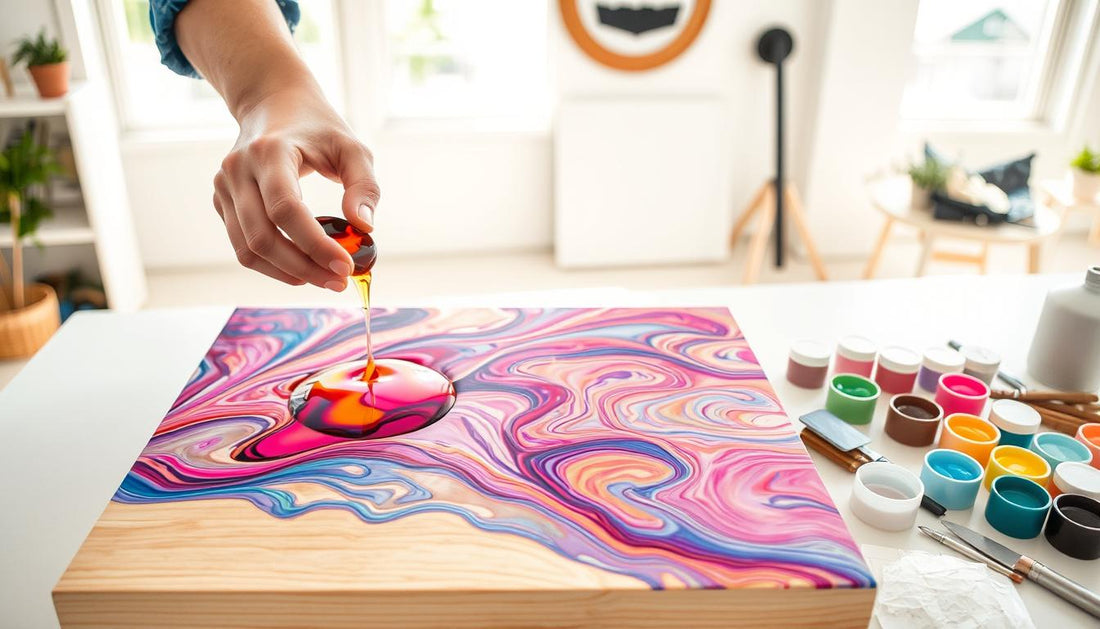
Pouring Techniques for Beginners
Pouring epoxy resin can seem intimidating at first, but with a few simple techniques, you can achieve professional-looking results. Start by preparing your workspace with a level surface and a silicone mold or tape border to contain the resin. Pour the mixed resin slowly and steadily to avoid creating bubbles. For larger projects, consider using a heat gun or torch to remove any bubbles that form.
To enhance your pouring technique, practice on a small scale before moving to larger projects. This will help you understand how the resin flows and how to control it. Additionally, watching tutorials and online demonstrations can provide valuable insights into different pouring methods and effects.
Adding Color and Effects
One of the most exciting aspects of working with epoxy resin is the ability to add color and create unique effects. You can use pigments, dyes, or even alcohol inks to achieve a wide range of colors and patterns. Experimenting with different additives, such as glitter or mica powder, can also add texture and visual interest to your art piece.
When adding color, start with small amounts and mix thoroughly to ensure an even distribution. It's also a good idea to test the color on a small sample before applying it to your main project. This allows you to adjust the intensity and tone to your liking.
By following these steps and experimenting with different techniques, you can create stunning epoxy resin art pieces that showcase your creativity. Whether you're making decorative items or wall art, the process of working with epoxy resin is both fun and rewarding, offering endless possibilities for resin art ideas and epoxy resin projects.
Advanced Techniques for Experienced Artists
Taking your epoxy resin art to the next level involves exploring sophisticated methods that yield professional-grade results. Experienced artists can significantly enhance their creations by mastering advanced techniques that add complexity and depth to their work.
Creating Ocean Waves with Resin
One of the most captivating effects in epoxy resin art is the creation of ocean waves. This technique involves layering different shades of resin to mimic the movement and texture of ocean waves. To achieve this, artists can use a combination of transparent and colored resin, carefully pouring and manipulating the resin to create the desired wave patterns.

To create realistic ocean waves, it's essential to understand the viscosity of the resin and how it interacts with the colors used. Experimenting with different ratios of resin to hardener and adding pigments or inks can help achieve the desired effect.
Using Alcohol Inks for Unique Designs
Alcohol inks offer a versatile medium for creating unique and intricate designs in epoxy resin art. By adding a few drops of alcohol ink to the resin, artists can achieve vibrant, marbled effects that are both unpredictable and captivating. The key to mastering this technique lies in understanding how the ink interacts with the resin and experimenting with different ink colors and concentrations.
- Start with a small amount of ink to avoid overpowering the resin.
- Experiment with different ink colors to achieve the desired palette.
- Use a mixing stick or tool to gently manipulate the ink and resin mixture.
Incorporating Natural Elements
Incorporating natural elements into epoxy resin art can add an extra layer of depth and meaning to the pieces. Elements such as leaves, flowers, and even sand can be encapsulated within the resin, creating stunning visual effects. The key is to ensure that the elements are dry and free of moisture to prevent unwanted reactions with the resin.
| Natural Element | Effect Achieved | Tips for Use |
|---|---|---|
| Leaves | Organic, earthy look | Ensure leaves are completely dry before embedding. |
| Flowers | Delicate, floral patterns | Press flowers flat before encapsulating to maintain their shape. |
| Sand | Textured, beachy effect | Use a fine sieve to sprinkle sand evenly across the resin surface. |
By incorporating these advanced techniques into their repertoire, experienced artists can continue to push the boundaries of what is possible with epoxy resin art, creating truly unique and captivating pieces.
Curing and Finishing Your Art
To achieve a professional finish, understanding the curing process and how to properly finish your epoxy resin art is essential. Curing is a critical step that requires patience, as it can significantly impact the final appearance of your art piece.
Understanding the Curing Process
The curing process involves the chemical reaction between the resin and hardener, resulting in a hardened, durable finish. Factors such as temperature and mixing ratio can affect curing time and quality. Ensuring a clean, dust-free environment during curing is crucial for a flawless finish.
Sanding and Polishing Your Piece
Once cured, sanding and polishing are necessary to achieve a high-gloss finish. Start with coarse grit sandpaper and progress to finer grits for a smooth surface. Polishing compounds can then be applied to enhance the shine, following resin art tips for the best results.
Adding Finishing Touches
The final step involves adding any finishing touches, such as applying a protective coat or decorative elements. This stage allows for creativity and personalization, making your DIY resin art truly unique.
Troubleshooting Common Issues
As you dive into the world of epoxy resin art, you may encounter a few common issues that can be easily resolved with the right knowledge and techniques. Whether you're a seasoned artist or just starting out with resin art for beginners, understanding how to troubleshoot problems is crucial for achieving a flawless finish.
Bubbles and Imperfections
One of the most common issues artists face is dealing with bubbles and imperfections in their epoxy resin art. To minimize bubbles, ensure your workspace is clean and dust-free. Using a torch can help remove bubbles that form on the surface. For more stubborn imperfections, consider using a fine-grit sandpaper to smooth out the surface after it has cured.
Tackiness and Curing Problems
Tackiness or incomplete curing can be frustrating. This issue often arises from incorrect mixing ratios or insufficient curing time. Always follow the manufacturer's instructions for mixing ratios, and ensure your project is curing in a warm, draft-free environment. If your project remains tacky after the recommended curing time, consider extending the curing period or gently heating the area with a heat gun.
Color Fading Solutions
Color fading can detract from the beauty of your epoxy resin art. To prevent this, use high-quality pigments that are specifically designed for epoxy resin. Avoid exposing your artwork to direct sunlight for prolonged periods, as UV light can cause colors to fade. If you're concerned about color stability, consider applying a UV-resistant topcoat to protect your art.
By understanding and addressing these common issues, you can enhance your epoxy resin art tutorial skills and create stunning pieces that stand the test of time. Remember, practice makes perfect, and troubleshooting is an essential part of the creative process.
Care and Maintenance of Epoxy Resin Art
Maintaining your epoxy resin art is not just about cleaning; it's about preserving its aesthetic appeal. To ensure your art pieces remain in pristine condition, it's essential to follow proper care and maintenance techniques.
Proper Cleaning Techniques
Cleaning your epoxy resin art requires gentle care. Avoid using harsh chemicals or abrasive materials that can damage the resin surface. Instead, use a soft, dry cloth to dust your art pieces. For more thorough cleaning, mix a mild soap with warm water, and gently wipe the surface with a soft cloth. Rinse with clean water and dry thoroughly to prevent water spots.
- Use a soft, dry cloth for dusting.
- Avoid harsh chemicals and abrasive materials.
- Mild soap and warm water can be used for deeper cleaning.
Protecting Your Art from Damage
To protect your epoxy resin art from damage, it's crucial to handle it with care. Avoid exposing your art pieces to direct sunlight for extended periods, as this can cause the resin to yellow or become brittle. Keep your art away from extreme temperatures and humidity levels.
Tips for Protection:
- Display your art away from direct sunlight.
- Maintain a stable environment in terms of temperature and humidity.
- Handle your art pieces with clean, dry hands.
Display Tips for Longevity
Displaying your epoxy resin art correctly can significantly impact its longevity. Consider using UV-filtering glass or acrylic for framing to protect the resin from UV damage. Ensure that your display method does not put undue stress on the art piece.
By following these care and maintenance tips, you can enjoy your epoxy resin art for years to come. Whether you're a seasoned artist or just starting out with resin art ideas, proper care will ensure that your creations remain vibrant and beautiful.
Opportunities to Sell Your Epoxy Art
The demand for epoxy resin art is on the rise, presenting artists with a chance to turn their passion into a profitable business. As the art market continues to evolve, epoxy resin projects and DIY resin art have become increasingly popular among collectors and enthusiasts.
Setting Up an Online Store
One of the most effective ways to sell epoxy resin art is by setting up an online store. Platforms like Etsy, eBay, and Shopify provide artists with a global marketplace to showcase their creations. To succeed, focus on high-quality product images and detailed descriptions.
Tips for a Successful Online Store:
- Use high-quality product images from different angles.
- Write detailed descriptions of the art pieces, including materials and dimensions.
- Utilize SEO techniques in your product titles and descriptions.
- Engage with customers through reviews and feedback.
Craft Fairs and Local Markets
Participating in craft fairs and local markets is another excellent way to sell epoxy resin art. These events allow artists to connect directly with potential buyers and receive immediate feedback on their work.
Benefits of Craft Fairs:
- Face-to-face interaction with customers.
- Opportunity to showcase art in a physical setting.
- Potential for immediate sales and commissions.
Marketing Your Creations
Effective marketing is crucial for selling epoxy resin art. Utilize social media platforms like Instagram and Facebook to showcase your art and engage with potential buyers. Collaborate with influencers and other artists to expand your reach.
| Marketing Channel | Benefits |
|---|---|
| Social Media | Wide reach, engagement with potential buyers. |
| Influencer Collaborations | Exposure to new audiences, credibility boost. |
| Email Marketing | Direct communication with potential and existing customers. |
By leveraging these opportunities and strategies, artists can successfully sell their epoxy resin art and build a sustainable business.
Joining the Epoxy Resin Community
Becoming part of the epoxy resin community can elevate your art to new heights. By connecting with fellow artists, you can share techniques, learn from others, and stay updated on the latest trends in resin art.
Online Platforms for Connection
Online forums and social media groups dedicated to epoxy resin art offer a wealth of knowledge and inspiration. These platforms are ideal for asking questions, sharing your work, and getting feedback from experienced artists. You can find valuable resources and tutorials on websites like YouTube and specialized resin art forums.
Workshops and Classes in Germany
Germany offers a variety of workshops and classes where you can learn epoxy resin techniques hands-on. These sessions are led by experienced artists who can guide you through complex projects and provide personalized feedback. Participating in these workshops is a great way to improve your skills and network with like-minded individuals.
Networking for Success
Networking with other artists can lead to new opportunities, collaborations, and insights into the world of resin art. By joining local art groups or attending resin art events, you can establish meaningful connections that can help you grow as an artist. Whether you're a beginner or an experienced artist, being part of the epoxy resin community can provide you with valuable resin art tips and inspiration for your next project.
FAQ
What is the best epoxy resin brand for beginners?
For beginners, popular epoxy resin brands like ArtResin, ProMarine Supplies, and Entropy Resins are highly recommended due to their ease of use and high-quality finishes.
How do I prevent bubbles in my epoxy resin art?
To prevent bubbles, ensure your workspace is dust-free, mix your epoxy resin slowly and carefully, and use a torch or heat gun to gently remove any bubbles that form.
Can I use epoxy resin on outdoor projects?
Yes, epoxy resin can be used on outdoor projects, but it's crucial to choose a UV-resistant epoxy resin to prevent yellowing or degradation from sunlight exposure.
What safety gear should I wear when working with epoxy resin?
When working with epoxy resin, wear protective gloves, safety glasses, and a mask to avoid skin contact and inhalation of fumes. Ensure good ventilation in your workspace.
How do I mix epoxy resin correctly?
To mix epoxy resin correctly, follow the manufacturer's instructions for the correct ratio of resin to hardener, mix slowly and thoroughly, and avoid introducing air into the mixture.
What are some common mistakes to avoid when working with epoxy resin?
Common mistakes to avoid include not following the manufacturer's instructions, not preparing your workspace properly, and not allowing sufficient curing time.
Can I add color to my epoxy resin art?
Yes, you can add color to your epoxy resin art using pigments, dyes, or alcohol inks. Experiment with different coloring agents to achieve unique effects.
How do I cure my epoxy resin art?
Curing times vary depending on the epoxy resin brand and environmental conditions. Generally, epoxy resin takes 24 hours to cure at room temperature, but it's best to consult the manufacturer's instructions.
How do I maintain and care for my epoxy resin art?
To maintain your epoxy resin art, dust it regularly with a soft cloth, avoid exposure to direct sunlight or extreme temperatures, and clean it gently with mild soap and water.
Can I sell my epoxy resin art online?
Yes, you can sell your epoxy resin art online through platforms like Etsy, eBay, or your own e-commerce website. Take high-quality photos, write detailed descriptions, and engage with potential buyers to succeed.