
Welcome to the world of epoxy resin art, where creativity meets technique. This exciting hobby allows you to create stunning pieces that can add a touch of elegance to your home decor.

Whether you're a seasoned crafter or a complete beginner, our guide is designed to help you get started with easy DIY projects. With epoxy resin art, you can explore your creative side and produce beautiful items.
Key Takeaways
- Discover the basics of epoxy resin art and its applications.
- Learn how to choose the right materials for your projects.
- Explore easy DIY projects suitable for beginners.
- Understand the techniques to achieve professional-looking results.
- Get tips on how to add a personal touch to your creations.
What is Epoxy Resin Art?
For those new to epoxy resin art, understanding the basics is crucial for unlocking the full potential of this versatile medium, allowing you to master various resin art techniques.
A Brief Introduction to Epoxy Resin
Epoxy resin is a type of plastic that hardens when mixed with a hardener, creating a strong and durable finish. This characteristic makes it an ideal material for crafting decorative and functional items. The process of mixing epoxy resin with hardeners to achieve the desired consistency and finish is fundamental to creating successful projects.
The Popularity of Resin Art
Resin art has gained popularity due to its versatility and the creative freedom it offers. Artists and DIY enthusiasts can experiment with different colors, textures, and shapes, making it a fun and engaging hobby. The glossy finish and durability of epoxy resin art make it particularly appealing for those looking to create long-lasting pieces.
To get started with resin art, one can explore various resources, including online tutorials and workshops. For instance, visiting this blog can provide valuable insights and tips for perfecting epoxy resin art techniques.
Common Uses for Epoxy Resin
Epoxy resin is used in a variety of applications, from decorative items like jewelry and coasters to functional pieces such as tabletops and countertops. Its durability and resistance to scratches and chemicals make it a practical choice for many projects.
| Application | Description | Benefits |
|---|---|---|
| Decorative Items | Jewelry, coasters, wall art | Aesthetic appeal, customization |
| Functional Pieces | Tabletops, countertops, flooring | Durability, resistance to chemicals |
| Artistic Projects | Mixed media art, sculptures | Creative freedom, versatility |
Understanding the various uses of epoxy resin can help beginners decide on their first project and explore the possibilities that resin art offers.
Tools and Materials Needed for Beginners
For those new to epoxy resin art, having the correct tools and materials is vital for success. Epoxy resin art can be a fun and creative hobby, but without the right supplies, beginners may encounter unnecessary challenges.
Essential Tools for Resin Art
To start creating with epoxy resin, you'll need some basic tools. These include a mixing cup, a stir stick, a thermometer, and a workspace cover. A mixing cup with measurements is crucial for accurately mixing the resin and hardener. A stir stick helps to mix the components thoroughly, while a thermometer ensures that the mixture is at the right temperature.
Other essential tools include a heat gun or torch for removing bubbles, a silicone spatula for scraping the sides of the mixing cup, and a dust mask or respirator for protecting yourself from fumes.
Best Types of Epoxy Resin for Beginners
Choosing the right epoxy resin can be overwhelming for beginners. However, some types are more suitable for those starting out. Look for epoxy resins that are labeled as "beginner-friendly" or "easy to mix." These resins typically have a longer working time, allowing you to mix and pour the resin without feeling rushed.
| Type of Epoxy Resin | Working Time | Difficulty Level |
|---|---|---|
| Quick-Curing | 5-10 minutes | Advanced |
| Standard | 20-30 minutes | Intermediate |
| Beginner-Friendly | 40-60 minutes | Beginner |
Safety Gear You Should Use
Safety should always be a top priority when working with epoxy resin. Essential safety gear includes gloves to protect your skin, goggles to protect your eyes, and a dust mask or respirator to prevent inhaling fumes. Working in a well-ventilated area is also crucial to prevent the buildup of fumes.
By investing in the right tools and materials, and following safety guidelines, beginners can set themselves up for success in the world of epoxy resin art. For more beginner resin art tips, consider exploring online tutorials or joining a resin art community.
Preparing Your Workspace
A well-prepared workspace is the foundation of a successful epoxy resin art project. It not only enhances your creativity but also ensures safety and efficiency. As you embark on your beginner resin art tutorial, having the right environment is crucial.
Choosing the Right Area
Selecting the appropriate area for your epoxy resin art projects is vital. Look for a space that is well-ventilated to avoid inhaling fumes from the resin and hardener. Ensure the area is dust-free and away from direct sunlight, which can cause the resin to cure too quickly or unevenly.
Key considerations include:
- A flat, stable surface to work on
- Adequate lighting to see the details of your work
- Protection from pets and children who might accidentally disturb your project
Tips for Keeping Your Workspace Clean
Maintaining a clean workspace is essential for the quality of your epoxy resin art. Dust and debris can easily get stuck in the resin, ruining the finish. Regularly clean your workspace with a damp cloth, and ensure all tools are washed and dried after use.
"A clean workspace is not just about aesthetics; it's about creating an environment where creativity can flourish without the risk of contamination or accidents."
Organizing Your Materials
Organization is key to efficiency and reducing stress during your creative process. Store your epoxy resin, hardener, pigments, and other materials in a designated area where they are easily accessible but not prone to spills or accidents.
Consider using storage solutions like:
- Plastic bins for storing resin and hardener
- Small containers for pigments and additives
- A tool organizer for your mixing sticks, gloves, and other equipment
By following these guidelines, you'll be well on your way to creating stunning easy epoxy resin projects that showcase your creativity and skill.
Basic Techniques for Epoxy Resin Art
Getting started with epoxy resin art means learning the foundational techniques that will guide your creative process. With these skills, you'll be able to create unique and captivating pieces.
Mixing Epoxy Resin and Hardener
The first step in any epoxy resin project is mixing the resin and hardener correctly. It's crucial to follow the manufacturer's instructions for the correct ratio, as this ensures proper curing. Typically, the mix is 1:1 or 2:1, but it can vary. Use a digital scale for accuracy, and mix thoroughly in a well-ventilated area.
To avoid introducing bubbles, mix slowly and gently. It's also helpful to mix in a container that is tall and narrow rather than wide and shallow, as this reduces the surface area and minimizes bubble formation.
Pouring Techniques for Beginners
Pouring epoxy resin can be intimidating at first, but with practice, you'll become more comfortable. Start by preparing your mold or surface, ensuring it's clean and free of dust. For beginners, using a mold with a smooth, even surface is recommended.
Pour the mixed resin slowly into the center of the mold, allowing it to flow outward naturally. This technique helps minimize air bubbles. If you're creating a layered effect, allow the first layer to partially cure before adding the next.
Adding Color and Pigments
Adding color to your epoxy resin can dramatically change the appearance of your final piece. You can use various pigments, including powders, pastes, or even inks. Start with a small amount of pigment and mix thoroughly, as a little goes a long way.
Experimenting with different colors and combinations can lead to unique effects. Consider creating a color wheel or testing samples before applying them to your main project.
| Pigment Type | Effect | Tips |
|---|---|---|
| Powder Pigments | Vibrant, opaque colors | Mix thoroughly to avoid lumps |
| Paste Pigments | Rich, deep colors | Start with a small amount to avoid over-saturation |
| Ink Pigments | Translucent, subtle colors | Use sparingly, as ink can be very potent |
Simple Epoxy Resin Projects
Now that you're familiar with the basics, it's time to dive into some easy epoxy resin projects perfect for beginners. These projects will help you develop your skills and create beautiful pieces for your home or as gifts.
Creating Coasters
Coasters are a great starting point for beginners. They're small, easy to make, and highly functional. To create coasters, you'll need to mix your epoxy resin with a hardener, add some color if desired, and pour it into coaster molds. Make sure to remove any bubbles that form to ensure a smooth finish.
Making Jewelry
Epoxy resin jewelry is not only beautiful but also durable. You can create pendants, earrings, or rings by mixing resin with pigments or glitters and pouring it into jewelry molds. Experimenting with different colors and inclusions can lead to unique and personalized pieces.
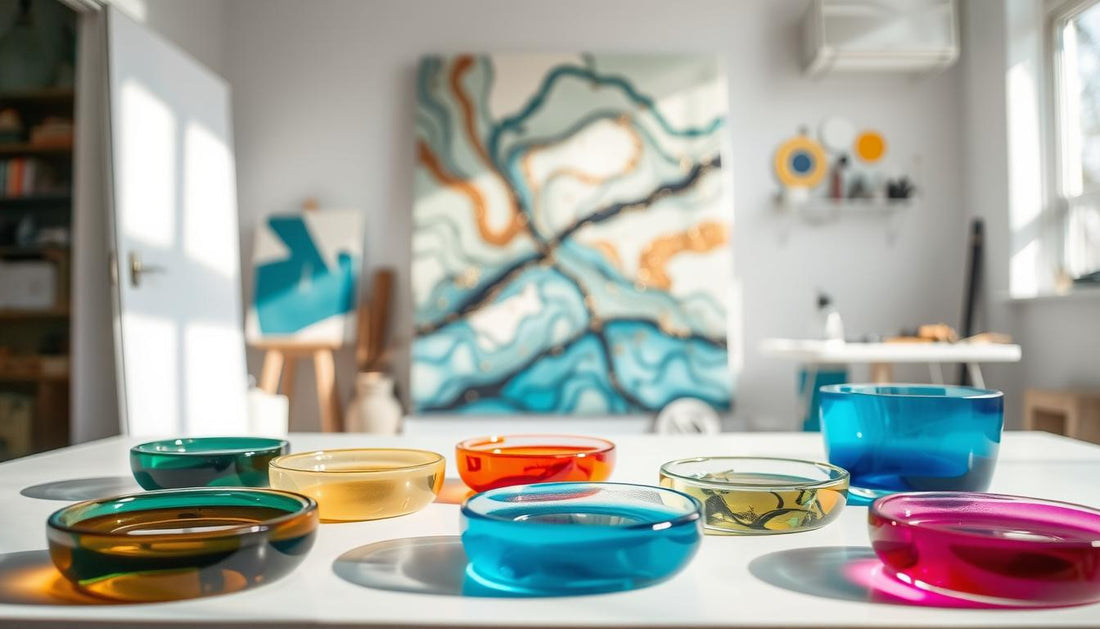
Designing Decorative Bowls
For those looking to create something more substantial, decorative bowls are a fantastic project. By using a mold or a creative approach like coating a existing bowl with resin, you can achieve a stunning piece of home decor. Pay attention to the curing process to ensure your bowl is durable and long-lasting.
These simple epoxy resin projects are just the beginning of your creative journey. As you gain more experience, you can move on to more complex projects, experimenting with different techniques and materials.
Understanding Curing and Drying Times
The curing time of epoxy resin is a critical aspect that beginners must understand to ensure their projects turn out as expected. Curing and drying times can significantly impact the final result of your epoxy resin art, making it essential to grasp the factors that influence these times.

What Affects Curing Time?
Several factors can affect the curing time of epoxy resin, including temperature, humidity, and the ratio of resin to hardener. Understanding these factors is crucial for achieving the desired outcome.
- Temperature: Higher temperatures can speed up the curing process, while lower temperatures slow it down.
- Humidity: High humidity can affect the curing time and the final texture of your project.
- Resin to Hardener Ratio: Incorrect ratios can lead to incomplete curing or overly rapid curing, affecting the project's durability.
| Factor | Effect on Curing Time |
|---|---|
| Temperature | Increases or decreases curing speed |
| Humidity | Can slow down curing or affect texture |
| Resin to Hardener Ratio | Incorrect ratios can lead to curing issues |
How to Tell When Your Project is Ready
Determining when your epoxy resin project is fully cured is crucial. A fully cured project will be hard to the touch and not sticky. You can also use a thermometer to check the temperature of the resin, as it will generate heat during the curing process.
Common Curing Mistakes to Avoid
Avoiding common mistakes can ensure your project cures properly. Some mistakes to avoid include not following the correct resin to hardener ratio, not mixing thoroughly, and not allowing the project to cure for the recommended time.
By understanding the factors that affect curing time and avoiding common mistakes, you can ensure that your epoxy resin art projects turn out as expected, providing a durable and long-lasting finish.
Troubleshooting Common Issues
Even with careful planning, epoxy resin art projects can sometimes go awry, but don't worry, we've got you covered. Whether you're a seasoned artist or a beginner, understanding how to troubleshoot common issues is crucial for achieving professional-looking results.
Bubbles and How to Eliminate Them
Bubbles are a common issue in epoxy resin art, but they can be easily managed with the right techniques. To minimize bubbles, make sure to mix your resin and hardener slowly and thoroughly. Using a mixing cup with a spout can help reduce the introduction of air into the mixture.
For bubbles that do form, a heat gun can be a lifesaver. Gently heating the surface can help bubbles rise to the top and pop. Be cautious not to overheat, as this can cause other issues, such as yellowing or uneven curing.
Dealing with Sticky Residue
A sticky residue on your epoxy resin project can be frustrating, but it's often a sign of incomplete curing. Ensure your workspace is at the right temperature, as most epoxy resins cure best between 65°F to 75°F (18°C to 24°C). If the residue persists, try gently sanding the area with fine-grit sandpaper and applying a new thin layer of resin.
It's also crucial to follow the manufacturer's instructions for the correct mixing ratio and curing time. Deviating from these guidelines can lead to a sticky or tacky finish.
Fixing Mistakes in Your Art
Mistakes happen, even to the most experienced artists. If you've added too much pigment or the color isn't mixing as expected, don't panic. For color corrections, you can often sand down the surface and start over with a new layer.
For more significant mistakes, such as uneven layers or unwanted texture, consider incorporating the mistake into your art. Sometimes, these "errors" can become unique features that add character to your piece.
By understanding how to troubleshoot these common issues, you'll be better equipped to handle any challenges that come your way, ensuring your epoxy resin art projects turn out beautifully every time.
Finishing Touches for Your Project
Once your epoxy resin project is cured, it's time to focus on the details that will elevate your art. The finishing touches are what transform a good project into a great one, and they're essential for showcasing your work.
Sanding and Polishing Your Resin Art
Sanding and polishing are crucial steps in achieving a smooth, glossy finish. Start by sanding your project with progressively finer grits of sandpaper, beginning with a coarse grit (around 120) and moving to finer grits (up to 600 or more). This process removes any imperfections and prepares the surface for polishing.
Tips for Sanding:
- Always sand in a well-ventilated area to avoid inhaling dust.
- Use wet sanding for a smoother finish and to reduce dust.
- Inspect your work under a light source to spot any remaining imperfections.
After sanding, apply a polishing compound to achieve a high-gloss finish. Use a soft cloth or polishing pad to buff the surface, working in small circular motions.

Adding a Top Coat
A top coat can add an extra layer of protection and shine to your resin art. Choose a top coat that is compatible with your epoxy resin and follow the manufacturer's instructions for application.
Benefits of a Top Coat:
- Enhanced durability and resistance to scratches and fading.
- Increased gloss and clarity.
- Protection against UV light damage.
Displaying Your Finished Work
Displaying your finished resin art is the final step in showcasing your creativity. Consider the environment where your art will be displayed and choose a location that minimizes exposure to direct sunlight or moisture.
| Display Tips | Benefits |
|---|---|
| Use a UV-filtering glass or acrylic for framing. | Reduces fading and damage from sunlight. |
| Keep your art away from moisture. | Prevents damage from humidity or water exposure. |
| Rotate your art periodically. | Ensures even exposure and prevents uneven wear. |
Inspiration for Your First Project
As you prepare to dive into the world of epoxy resin art, discovering inspiring ideas and resources can help shape your first project. Finding the right inspiration is crucial for sparking creativity and ensuring a successful outcome.
Finding Ideas Online
The internet is a treasure trove of creative ideas. Websites like Pinterest and Instagram are filled with beginner resin art ideas that can spark your creativity. You can search for hashtags like #resinart or #epoxyresin to discover new and exciting projects.
- Explore online galleries and portfolios
- Check out DIY blogs and websites
- Watch YouTube tutorials for visual guidance
Joining Resin Art Communities
Joining a community of like-minded artists can be incredibly motivating. Look for online forums or local groups where you can share your work, get feedback, and learn from others. This is a great way to stay updated on the latest resin art supplies for beginners.
Following Tutorials
Tutorials are an excellent way to learn new techniques and gain confidence in your craft. Follow step-by-step guides to create your first project, and don't be afraid to experiment and try new things.
By finding inspiration online, joining resin art communities, and following tutorials, you'll be well on your way to creating a stunning first project that showcases your creativity.
Tips for Developing Your Skills
The journey to mastering epoxy resin art involves refining your techniques and experimenting with new ideas. As you continue to create, it's essential to develop your skills further.
Practicing Different Techniques
One of the best ways to improve your epoxy resin art skills is by practicing different techniques. This could involve trying out various pouring methods, such as the dirty pour or the layered pour, to achieve unique effects.
Experimenting with different tools, like heat guns or torchs, can also help you understand how to manipulate the resin to achieve desired outcomes.
Experimenting with New Materials
Don't be afraid to experiment with new materials in your epoxy resin art. Adding different pigments, glitters, or even natural elements like leaves or flowers can create intriguing textures and visual effects.
Some artists also incorporate other materials, such as wood or metal, into their resin art to add depth and complexity.
| Material | Effect | Tips |
|---|---|---|
| Pigments | Color variation | Start with small amounts to achieve desired color intensity |
| Glitter | Sparkle and shine | Mix well to avoid clumping |
| Natural elements | Unique textures | Ensure elements are dry to avoid bubbles |
Seeking Feedback from Others
Joining a community of epoxy resin art enthusiasts can be incredibly beneficial. Sharing your work and receiving feedback from others can provide new insights and ideas.
Online forums and social media groups are great places to connect with other artists and learn from their experiences.
By practicing different techniques, experimenting with new materials, and seeking feedback, you'll be well on your way to developing your skills in epoxy resin art.
Next Steps for Epoxy Resin Art Enthusiasts
Now that you've completed your first epoxy resin art project, it's time to take your skills to the next level. Exploring advanced techniques will help you create more complex and intriguing pieces, such as incorporating different materials or using various pouring methods.
Advanced Techniques to Try
Experiment with new methods, like layering or using pigments, to add depth and uniqueness to your art. You can also try creating resin art with embedded objects or using different mold shapes.
Further Learning Resources
To continue improving, look for online tutorials, workshops, or classes that focus on epoxy resin art for beginners and beyond. Websites like YouTube, Craftsy, or Skillshare often have a wide range of classes on resin art.
Joining a Community
Connecting with local art groups or online forums can be a great way to learn from others, get feedback on your work, and stay inspired. Look for groups on social media platforms or attend local art events to meet other epoxy resin art enthusiasts and learn how to start resin art from experienced artists.
FAQ
What is the best type of epoxy resin for beginners?
For beginners, it's recommended to start with a clear epoxy resin that's easy to mix and has a relatively long working time. Brands like ArtResin and ProMarine Supplies offer high-quality epoxy resins that are perfect for beginners.
How do I prevent bubbles in my epoxy resin art?
To prevent bubbles, make sure to mix your epoxy resin slowly and carefully, and avoid stirring too vigorously. You can also use a torch or a heat gun to gently remove any bubbles that form.
What safety gear should I use when working with epoxy resin?
When working with epoxy resin, it's essential to wear protective gear, including gloves, safety glasses, and a mask. This will help prevent skin irritation and exposure to fumes.
How long does it take for epoxy resin to cure?
The curing time for epoxy resin depends on the specific product and environmental conditions. Generally, it can take anywhere from a few hours to several days for epoxy resin to fully cure.
Can I add color to my epoxy resin?
Yes, you can add color to your epoxy resin using pigments, dyes, or powders. Make sure to choose a colorant that's specifically designed for use with epoxy resin.
How do I sand and polish my epoxy resin art?
To sand and polish your epoxy resin art, start with a coarse-grit sandpaper and work your way up to finer grits. Use a polishing compound to achieve a high-gloss finish.
What are some beginner resin art ideas?
Some beginner-friendly resin art ideas include creating coasters, making jewelry, and designing decorative bowls. These projects are great for practicing basic techniques and building confidence.
How do I troubleshoot common issues with my epoxy resin art?
Common issues like bubbles, sticky residue, and mistakes can be resolved by following troubleshooting tips. Check online resources or consult with experienced resin artists for guidance.
Can I use epoxy resin to create functional items?
Yes, epoxy resin can be used to create functional items like coasters, cutting boards, and tabletops. Make sure to follow proper safety guidelines and use a food-safe epoxy resin if intended for food contact.
Where can I find inspiration for my epoxy resin art?
You can find inspiration online through social media, resin art communities, and tutorials. Joining online forums or local art groups can also help spark your creativity.